

How to Use Magic Resin for Coatings
Want to learn how to use our Deep Pour & Casting epoxy instead? Click here.
For optimal results, make sure that the temperature of the room and the resin is around 21-24c (70-75f). The thicker the pour, the lower the temperature should be for the first several hours.
Tip: If for any reason your bottles are cold, you can put them in warm water to accelerate the process. Ensure that the product acclimates to room temperature prior to usage.
A single pour should be no more than 1/4” of resin, else you will need to do multiple pours.
For deeper pours up to 4”, check out our Deep Pour & Casting epoxy.
STEP 1: MEASURE
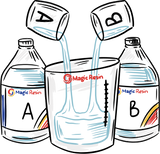
With gloves on, pour equal amounts of resin (A) and hardener (B) into a mixing cup. Ex.: 250ml (A) with 250ml (B). By weight, the ratio is 100A for 85B.
STEP 2: MIX

Stir both parts slowly by hands for 4-5 minutes. Make sure to scrap the sides while stirring. Once done, you have around 30 minutes of working time.
STEP 3: POUR

Make sure that your project is leveled and pour the resin on it. DO NOT scrap the resin out of the container, just dump it and leave the remaining material in the container.
Tip: After pouring, you can quickly pass a blow torch a few inches over the resin to pop all the extra air bubbles.
STEP 4: WAIT

If you need to do an additional pour, you can do do so between 4 to 10 hours after the last pour. If you wait longer than that, you will need to sand your project with some 180 or 220 grit sandpaper.
Your project will be hard within 24 hours, and cured within 3 days.
If your project is something like a table top or a coaster, we recommend to wait at least 7 days before putting things on it, to ensure that the resin has become fully scratch-resistant.
The remaining step is to enjoy your amazing creation!